Jitsi Meet Oscar Integration

eForm for Integrating Video Virtual Care with OscarEMR

 
Although telephone calls may be part of virtual care, this technology has been around for over 150 years and is nothing new. Having more visual and salient information about a patient via a real-time video conferencing solution is crucial for making a safe diagnosis, and improving quality of care. This is important when health providers do not have the ability to conduct in-person direct patient physical exams. 
 
With the VideoVisit eForm (Jitsi Meet Oscar Integration):
  • You can see patients online virtually... "The doctor will see you now."
  • Automatically create a secure unique (per patient, per day) video meeting room to a Jitsi Meet server and email the link and instructions to the patient (must be same day) with a click... For FREE.

Requirements:

  • A working version of OSCAR electronic medical record system
  • Internet access
  • Webcam with Microphone
  • Speakers or headphones/earbuds
  • HTML5 enabled webbrowser such as Firefox or Chrome; or Jitsi Meet app for your mobile phone
Instructions:
  • [ Download ] the VideoVisit eForm, save the ZIP to your computer.
  • Log in to your OSCAR system and find the Administration Menu.
  • Upload the ZIP eForm package to eForm Library (Administration -> Forms/eForms -> Manage eForms -> Import)
  • IMPORTANT: Please EDIT the beginning eForm HTML settings to configure to your local instance requirements (ie. change the video server URL, change the salt words, clinic name and add any other messages to the default email template)
Notes:
    Jitsi Meet is a secure encrypted end-to-end open source video conferencing platform. It uses WebRTC, the same open source encrypted video protocol that OTN uses. The default eForm uses the public Jitsi Meet server for demonstration purposes. It is highly unlikely anyone will be able to video bomb your meeting as the ethereal links are more complicated and unique than a series of numbers. Since the URL link changes every day, and your encounters are brief, it is unlikely someone will be able to brute force guess your unique links and video bomb your encounter. For safety, you can always enable Lobby feature, or add a Password to the room after your patient/client enters the room.
    We recommend installing your own self-hosted private Jitsi Meet server and link the eForm to your private server for enhanced security. You can enable username/password authentication with a private Jitsi server, as well as Lobby/Waiting Room function, and Room password. You can also connect to a VoIP number and make calls out from a meeting room, so instead of picking up the phone, you can do your conference calls with Jitsi Meet as well (no need to change to a phone).


Enable Prosody Authentication

Allow only Host users to create meeting links


Install Jitsi-Meet

Video conferencing server


You may want to watch this installation video online, and read this official Quick Start Guide, to supplement these instructions as well.

Be sure to use the Fully Qualified Domain Name (FQDN) when installing Jitsi-Meet (ie. meet.yourdomain.ca) otherwise, you will not be able to access Jitsi from the Internet. If you use your local IP address, you can only access Jitsi Meet from within you network and only with your local IP address.

Add the Jitsi keys:

$ sudo apt-add-repository universe

$ sudo apt-get install apt-transport-https

$ wget -qO - https://download.jitsi.org/jitsi.org/jitsi-key.gpg.key | sudo apt-key add -


Add Jitsi Repository:

$ sudo nano /etc/apt/sources.list.d/jitsi-stable.list

deb https://download.jitsi.org stable/

Ctrl-O to save and Ctrl-X to exit

If you plan on using your own SSL certificate (that you created and certified with a commercial certificate authority, place and name the certificate and keyfile in the following locations with your Jitsi domain name before installing Jitsi-Meet. The installation will find these and reference them.

/etc/ssl/meet.yourdomain.ca.crt

/etc/ssl/meet.yourdomain.ca.key

Install Jitsi-Meet:

$ sudo apt-get update

$ sudo apt-get install jitsi-meet

When given a chance to specify the Hostname of your Jitsi-Meet, please use the Fully Qualified Domain Name (FQDN) that you set up previously (ie. meet.yourdomain.ca)

When prompted for "Configuring jitsi-meet-web-config", you can choose to use Let's Encrypt to generate a free SSL certificate that you can use to secure your Jitsi server (you must use an SSL certificate for WebRTC video to work on Jitsi Meet), or you can use your own certificate. If you use Let's Encrypt, then choose to "Generate a new self-signed certificate". For this option, your Firewall/Router needs to have your external ports 443 and 80 redirected to your local IP address of your Jitsi server. This allows Let's Encrypt Certbot to access and verify your server instance in order to install an SSL certificate.

Install SSL Certificate

Instead of using the Jitsi Meet install-letsencrypt-cert.sh script, consider installing Certbot manually (which you may need to know how to reinstall if you upgrade your Ubuntu server in the future, which may remove Certbot).

Redirect unencrypted http traffic (port 80) to https (port 443):

$ sudo ls /etc/apache2/sites-enabled

$ sudo ls /etc/apache2/sites-available

$ sudo nano /apache2/sites-enabled/000-default.conf

Redirect / https://meet.yourdomain.ca/

Note: Be sure to add the trailing forward slash / to the end of your redirect URL

Install Certbot:

$ sudo add-apt-repository ppa:certbot/certbot

$ sudo apt-get install python-certbot-apache

$ sudo certbot --apache -d meet.yourdomain.ca

Note: You may need to install a different Certbot package if you used NGINX as the web server

Enable Certbot to autorenew SSL certificate:

$ sudo crontab -e

0 0 1 * * /usr/bin/certbot renew

Ctrl-O to Save and Ctrl-X to Exit

Start using your very own Jitsi Meet server!

Open a web browser and go to https://meet.yourdomain.ca

You should see a blue Jitsi Meet welcome page. Your done! YAY!

You may also be interested in connecting VoIP to your Jitsi:

Read Next: Install Jigasi


Install Jigasi SIP Communicator

Add telephone call capabilities to your Jitsi Meet Video Conference system

By installing this next component, Jigasi, to you Jitsi installation, you can add VoIP telephone capabilities to your video call system. You can be in a video call with one or more people, and then dial out to a landline or cell phone number from within the video meeting room. You can also enable the function of people dialing in to join a meeting room (advanced users only, requires knowledge to setup Asterisk or FreePBX VoIP server).

Add Google DNS nameservers to your Jitsi Ubuntu server (instructions for Ubuntu LTS 18)

  • For previous versions of Ubuntu (ie. 16), you could just edit /etc/resolv.conf and add addition nameservers for the server. You could also edit the network configuration at /etc/network/interfaces.
  • However, starting with Ubuntu LTS 18, the network settings are done on YAML files that look similar to /etc/netplan/01-netcfg.yaml

$ sudo ls /etc/netplan

$ sudo nano /etc/netplan/01-netcfg.yaml

network:
    version: 2
    rendered: networkd
    ethernets:
        eno1:
            dhcp4: yes
            nameservers:
                addresses: [8.8.8.8, 8.8.4.4]

Add the items in italic starting with nameservers:
Note: the indentation matters, make sure that it looks similar to the above

Enable the changes:

$ sudo netplan --debug apply

If you get errors, then re-edit the YAML file and ensure that you have the indentations correct. Add a few more spaces if in doubt.

Get a SIP account credential to use with Jitsi/Jigasi:

  • Sign up and create a SIP account with your favourite SIP provider. We like to use VoIP.ms
  • Read: Introduction to VoIP on getting started with a SIP Subaccount

Example: VoIP.ms Subaccount

SIP Account:     This email address is being protected from spambots. You need JavaScript enabled to view it.
Username:    187000_121
SIP Server:    toronto9.voip.ms
Authentication ID:    187000_121    (the same as the Subaccount name)
Password:    *******

Install Jigasi SIP Communicator:

$ sudo apt-get update

$ sudo apt-get install jigasi


When you are prompted to enter your SIP username, be sure to enter it correctly following our example.

Example SIP username:    This email address is being protected from spambots. You need JavaScript enabled to view it.

When prompted for the password, be sure to enter the password correctly (you only get one try, and there is no confirmation) ********

When Jigais is finished installing, fix somethings first that don't come with the online documentation:

$ sudo chown jigasi /etc/jitsi/jigasi

$ sudo usermod -a -G prosody admin

$ sudo apt-mark hold jigasi

Note: Replace the italicized admin with the username of your sudo user that you created and installed Ubuntu and Jitsi with
Note: Sometimes, upgrading jigasi packages may cause it to break, so the jigasi package is held back with the above command until you are sure the developer fixed his problems.

Edit the sip-communicator.properties

$ sudo nano /etc/jitsi/jigasi/sip-communicator.properties


Find the parts of the file that contain the following similar segments and replace the italicized items with settings that fit your own scenario. I used ..... to shorten what is actually written in the file, and to skip several lines, for display brevity here. You need to scroll down to find the right line, or use Ctrl-W to search with a keyword.

.... DEFAULT_JVB_ROOM_NAME=MyClinicWaitingRoom

....

.... USER_ID=187000_121
.... PASSWORD=cGFzc3dvcmQ=                # The password is in encoded in base64 format
.... AUTHORIZATION_NAME=187000_121                # You need to add an extra line with this setting here, type in the line so it starts similar to the beginning of the other lines above

....

# Uncomment out the line below, if you are having certificate chain issues with your VoIP provider
net.java.sip.communicator.service.gui.ALWAYS_TRUST_MODE_ENABLED=true

....

# Uncomment out the line below to enable SIP
org.jitsi.jigasi.ENABLE_SIP=true

Note: Delete the server name ie. @toronto9.voip.ms at the end of the USER_ID entry that comes default.
Press Ctrl-O to Save, and Ctrl-X to Exit.

  • You may also want to comment out any codecs that you don't want to use. Sometimes VoIP.ms fails because it is trying to negotiate too many codecs when connecting
  • PASSWORD: If you typed in the wrong password, and need to replace it in the above properties file, you need to enter it in Base64 format. Click on this website and type in your password and click >Encode< to see that your plaintext password looks like in Base64.

Add an XMPP setting to Jicofo/sip-communicator.properties. Edit the file and add the following line below to what is already existing in the file:

$ sudo nano /etc/jitsi/jicofo/sip-communicator.properties

.....
org.jitsi.jicofo.auth.URL=XMPP:meet.yourdomain.ca


Temporarily enable Authentication to create the domain in Prosody and a first username:

  • For some reason, the online instructions for installing Jitsi/Jigasi don't explain how to get Jigasi to work.
  • By default, Jitsi will allow meeting room creation by anyone (anonymous users).
  • You can Enable Authentication so only a Host user with a username and password can only start/activate a meeting room link.
  • To get Jigasi SIP-communicator working, we will turn on authentication temporarily, in order to create a Prosody domain and username.

$ sudo nano /etc/prosody/conf.avail/meet.yourdomain.ca.cfg.lua

.....

VirtualHost "meet.yourdomain.ca"
        authentication = "internal_plain"

Change the authentication from "anonymous" to "internal_plain".
Press Ctrl-O to Save, and Ctrl-X to Exit.

Restart all the services, and reboot the server just to ensure all the settings are loaded:

$ sudo service prosody restart

$ sudo service jicofo restart

$ sudo service jigasi restart

$ sudo shutdown -r now


Once the Jitsi server is rebooted, create a first username and password for meet.yourdomain.ca in Prosody. This will create a directory to store future usernames and passwords:

$ sudo prosodyctl register username meet.yourdomain.ca secretpassword

Note: you can use this opportunity to create an XMPP username "sipxmpp" and password to be later entered in to settings when you want to Enable Authentication later on.
Example: sudo prosodyctl register sipxmpp meet.yourdomain.ca ********

  • A new directory will be created that looks like /var/lib/prosody/meet%2eyourdomain%2eca
  • Inside that directory, you will find the username and passwords that you created for Prosody

Now go back and turn OFF authentication:

$ sudo nano /etc/prosody/conf.avail/meet.yourdomain.ca.cfg.lua

.....

VirtualHost "meet.yourdomain.ca"
            authentication = "anonymous"

Change "internal_plain" back to "anonymous".
Press Ctrl-O to Save, and Ctrl-X to Exit.

Then restart the services and reboot the server for good measure, again:

$ sudo service prosody restart

$ sudo service jicofo restart

$ sudo service jigasi restart

$ sudo shutdown -r now


Check to see if Jitsi and SIP communicator is working:

  • Open a web browser and go to https://meet.yourdomain.ca
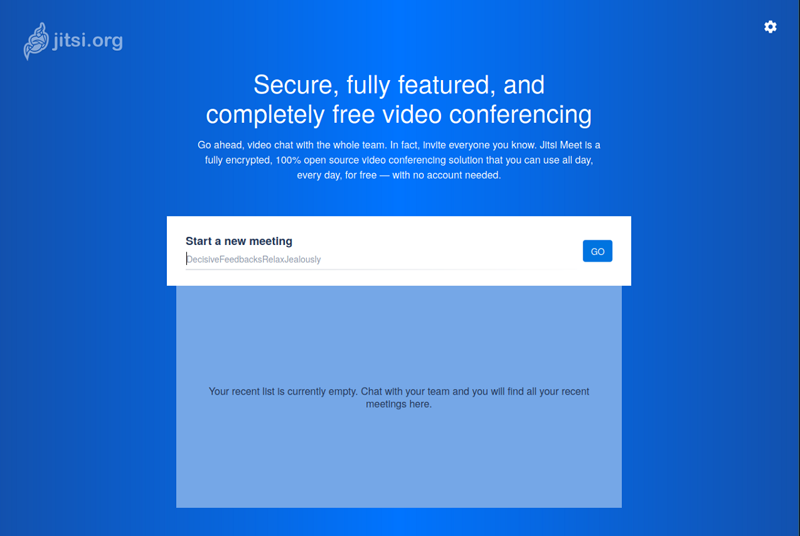
  • You should see a blue Jitsi welcome screen. YAY!
  • Start a meeting link.
  • If you installed Jigasi SIP communicator correctly, you should be able to see a + sign at the bottom right icons.
  • You can also check to see if Jigasi is connecting to your SIP Subaccount correctly, by loggin in to your VoIP account (ie. Voip.ms) and check to see if it the Subaccount is registering green.
    • If your Subaccount is registering green (active connection), but you don't see the + sign, then there is something wrong with your Jigasi installation and settings.
    • If you Subaccount is not registering (red, inactive), then it means that you typed in the wrong SIP username and password in /etc/jitsi/jigasi/sip-communicator.properties or you may not have entered the settings correctly (the USER_ID should just be the Subaccount name and NOT include the @server)
  • You can also try checking your log files for errors:
    • /var/log/jitsi/jigasi.log
    • /var/log/jitsi/jvb.log
    • /var/log/jitsi/jicofo.log
    • /var/log/prosody/prosody.log

Some Location of Jitsi and Jigasi Customization:

  • /usr/share/jitsi-meet/interface_config.js
  • /etc/jitsi/meet/meet.yourdomain.ca-config.js
  • /usr/share/jitsi-meet/libs/app.bundle.min.js
  • /usr/share/jitsi-meet/title.html
  • /usr/share/jitsi-meet/statis/welcomePageAdditionalContent.html
  • /usr/share/jitsi-meet/favicon.ico


Preparation

Jitsi Meet

Install Ubuntu Server LTS

  • Download Ubuntu LTS Server 18
  • Use Virtual Machine Manager to create new virtual with the following steps
  • Create a qcow2 container (around 15 GB) that you will install the Ubuntu server and Jitsi on
  • Create a new Virtual Machine called "Jitsi" with the Ubuntu LTS ISO and the new qcow2 container you created, with a minimum of the following specifications:
    • 2 GB RAM
    • 2 CPU
    • 15 GB Disk (qcow2)
    • 1 GbE network interface
  • Remember to update and upgrade your server before installing Jitsi

$ sudo apt-get update

$ sudo apt-get upgrade


Setup a Fully Qualified Domain Name

  • Jitsi requires a fully qualified domain name (FQDN) that is accessible through by the Internet.
  • Log in your domain name provider and edit the DNS records to create your own domain name "yourdomain.ca" for your Jitsi Meet instance.
    • DNS record type:           A
    • Subdomain name:         meet
    • Value:                             yourfixedipaddress        (ie. 73.394.290.30)
  • Give the Internet time to refresh your DNS records. You can perform a hostname lookup to confirm that the DNS record changes have propagated through the Internet.
  • Log in to your newly created Ubuntu LTS server (via Virtual Machine Manager or SSH)
  • Append the FQDN to the "/etc/hosts" file, use spaces to separate the different domain aliases:

Note: remember to add the local IP address of your server inside your own network as well, ie. 192.168.1.140

$ sudo nano /etc/hosts

127.0.0.1                localhost localhost4 localhost.localdomain localhost4.localdomain4
127.0.1.1                Jitsi meet.yourdomain.ca
192.168.1.140        Jitsi meet.yourdomain.ca

Ctrl-O to Save, and Ctrl-X to Exit.

  • After any changes, reboot the VM server Jitsi
$ sudo shutdown -r now


Create Port Forwards on your Firewall/Router

  • Log in to your Firewall / Router and open the following ports to point to your Jitsi server (local IP address)
    • Port: 80        Protocol: tcp
    • Port 443       Protocol: tcp
    • Port: 4443    Protocol: tcp
    • Port: 10000  Protocol: udp

Install a Webserver such as Apache2

  • This installation instruction uses Apache2. If you want to use NGINX, please install that first, before installing Jitsi-Meet. If you do not install a web server, then Jitsi-Meet will install its own webserver.

$ sudo apt-get install apache2

$ sudo systemctl enable apache2

$ sudo systemctl start apache2


Install Ubuntu UFW (Uncomplicated Firewall) rules:

  • If you plan on enabling UFW firewall on your Jitsi Ubuntu server, then be sure to open ports, otherwise, leave the firewall off. If you are having trouble making Jitsi work after installation, the Ubuntu firewall may not be set up properly, try turning off UFW and see if it fixes you problems. Then add the missing ports to UFW.

$ sudo ufw status

$ sudo ufw enable

$ sudo iptables -L -n

$ sudo ufw disable

$ sudo ufw allow in ssh

$ sudo ufw allow in OpenSSH

$ sudo ufw allow in 80/tcp

$ sudo ufw allow in 443/tcp

$ sudo ufw allow in 4443/tcp

$ sudo ufw allow in 10000:20000/udp

$ sudo ufw allow in Apache

$ sudo ufw enable


Read Next: Install Jitsi-Meet